Pay Using Quick Pay
Collect payment with ease using Quick Pay
Overview
Quick Pay lets you accept payments quickly with minimal required information. This guide walks you through starting a Quick Pay transaction, entering optional details, processing a card/cash/check payment, and completing the payment with a receipt.
Starting a Quick Pay Transaction
Opening Quick Pay
- Click Quick Pay in the left-hand menu.
- A pop-up window will appear with default settings for:
- Type of Sale – Sale or Refund
- Tender Type – Card, Cash, or Check
- Presence Type (for card payments) – Card Not Present, Keyed, Swiped, or Terminal
Note:
Default settings can be adjusted in Payment Settings.
Entering Advanced Details
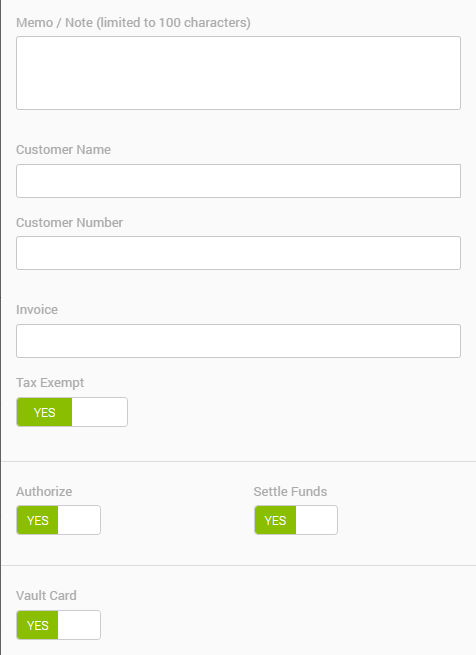
By clicking on the Advanced tab, you will open optional data fields that help you track the payment more accurately. Feel free to fill them out as needed.
- Memo / Note – Add an optional note for the payment.
- Customer Name – Search or enter a customer; creates a new one if not found.
- Customer Number – Search by number or enter your own ID.
- Invoice – Enter an invoice number for this payment.
- Tax Exempt – Mark the transaction as tax-exempt.
- Tax Amount – Enter the tax included in the total.
- Authorize – Toggle off to enter an offline authorization code.
- Settle Funds – Choose whether to include the payment in today’s settlement.
- Vault Card – Save the card for future use.
Note:
- You can learn more about each field in the Quick Pay portal guide
- All fields in this section are optional.
Level 3 Data
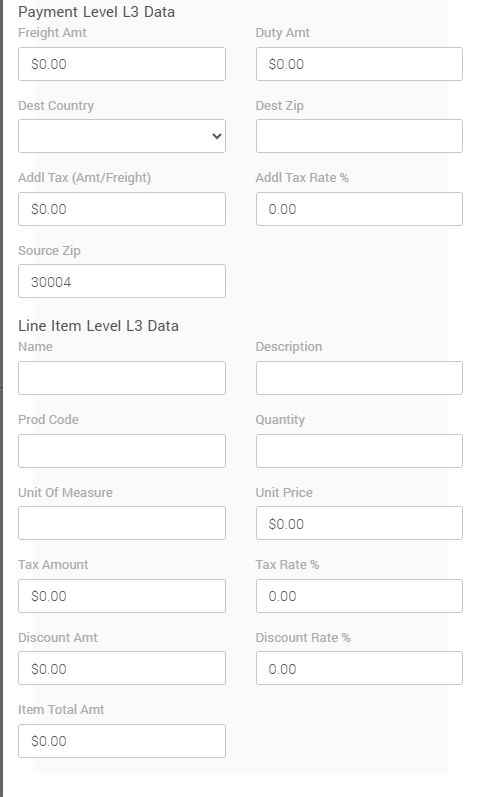
For detailed, itemized payment data, select Level 3 Data after opening Advanced.
You can enter shipping, tax, and product-level information such as:
- Freight and duty amounts
- Destination and source ZIP codes
- Item name, description, product code
- Quantity, unit price, unit of measure
- Item-level tax, discounts, and totals
Note:
- You can learn more about each field in the Quick Pay portal guide
- All fields in this section are optional.
Receiving a Payment
Processing a Card Payment
- Set Type of Sale to Sale.
- Set Tender Type to Card.
- Select the Presence Type:
- Card Not Present
- Card Present Keyed
- Card Present Swiped
- Terminal
- Enter the total amount.
- Enter or swipe the card details, or click Request Payment if using a terminal.
- Add optional Advanced or Level 3 details if needed.
- Charge.
Note:
You may be prompted to enter the last four digits of the card if required by Loss Prevention settings.
Processing a Cash Payment
- Set Tender Type to Cash.
- Enter the total amount.
- Click Tender.
Processing a Check Payment
- Set Tender Type to Check.
- Enter the total amount.
- Enter the name on the check.
- Enter the phone number or check number if required.
- Click Tender.
Completing the Payment
After clicking Charge or Tender, a pop-up will display the transaction result:
- Approved – You may send a receipt or associate the payment with a customer.
- Declined – Review the error and click Back to retry or choose another payment method.
Receipt Options (for approved payments)
- Email – Enter or confirm the customer's email
- Text – Enter or confirm a phone number
- Print – Opens a printable receipt in a new tab
- No Receipt – Close the pop-up
Note:
The system may automatically match the transaction to an existing customer if the card is recognized.
Updated 20 days ago