Sales Tax
Manage Sales Tax Collection
Learn how to manage taxes and tax categories in MX Merchant, including creating, editing, and organizing tax settings for your business.
Overview
MX Merchant lets you view, create, modify, and manage taxes and tax categories. You’ll learn what each table displays, how taxes and categories work together, and how to configure them to meet your business’s needs.
Prerequisites
- To adjust sales tax settings, the user must have an Admin or Sub-Admin role.
Viewing Your Taxes
Upon clicking Sales Tax in the Settings page, you'll see two tables: Taxes and Tax Categories. They contain the following information:
Taxes - These are charges that you set up on MX Merchant. These may include vat, sales taxes, state taxes and surcharges, among others.
- Tax Name - Name that you gave to the tax.
- Description - Brief description of the tax.
- Rate % - Percentage amount that is charged whenever the tax is applied.
- Categories - Categories where the tax is used.
Tax Categories - These are collections of taxes; they allow you to apply several taxes simultaneously, for example, applying a sales tax and a state tax at once.
- Primary - Indicates whether the tax category is the primary category used for payments in your business. It is marked by a check mark.
- Category Name - Name that you gave to the tax category.
- Rate % - Percentage amount charged through that tax category.
- Taxes - Taxes included in the category.
Note:
No taxes come preconfigured on MX Merchant. Make sure to include all taxes needed to comply with local legislation.
Managing Taxes
Creating a New Tax
- Click + Add Tax. An overlay window will pop up.
- Fill in the following information:
- Tax Name - Give a name to identify the new tax.
- Description - Brief description of the tax.
- Rate % - Percentage amount you need to charge whenever the tax is applied.
- Save
Modifying a Tax
- Click the tax name (in the leftmost column, in green).
- After the overlay window pops up, adjust information as needed.
- Save
Deleting a Tax
- Click the tax name (in the leftmost column, in green).
- After the overlay window pops up, Delete.
Managing Tax Categories
Creating a New Tax Category
- Click + Add Category. An overlay window will pop up.
- Fill in the following information:
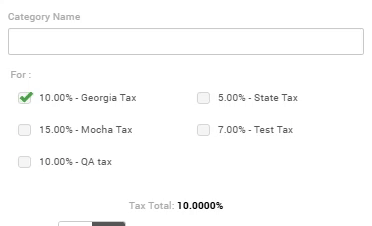
- Category Name - Give a name to identify the new tax category.
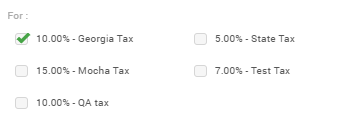
- For - Check the existing taxes that will be applied through the new tax category.
* **Primary** - Indicate whether the tax category will be the primary one: *Yes* or *No*.
* **Tax Total** - This is the total percentage amount when applying all the taxes marked in **For**. This field is updated automatically as you check or uncheck taxes.
Note:
You can only have one primary tax category at a time. If you need to make a tax category the primary one, be sure to unmark any previous categories marked as primary.
- Save
Modifying a Tax Category
- Click the category name (in the center-left column, in green).
- After the overlay window pops up, adjust information as needed.
- Save
Deleting a Tax Category
- Click the category name (in the center-left column, in green).
- After the overlay window pops up, Delete.
Updated 20 days ago