Payment Links
Using Payment Links for Easy Online Transactions
Learn how to create, customize, and manage MX Merchant Payment Links to streamline customer payments and collect the information you need.
Overview
Payment Links in MX Merchant allow you to quickly create customizable pages where customers can submit payments securely and efficiently. This guide walks you through viewing your existing links, creating new ones, adding custom fields, and adjusting the design to match your branding. By the end, you'll know how to build and tailor payment links that capture exactly the information you need from your customers.
Prerequisites
- You must have an Admin, Sub-Admin or Supervisor role.
Viewing Payment Links
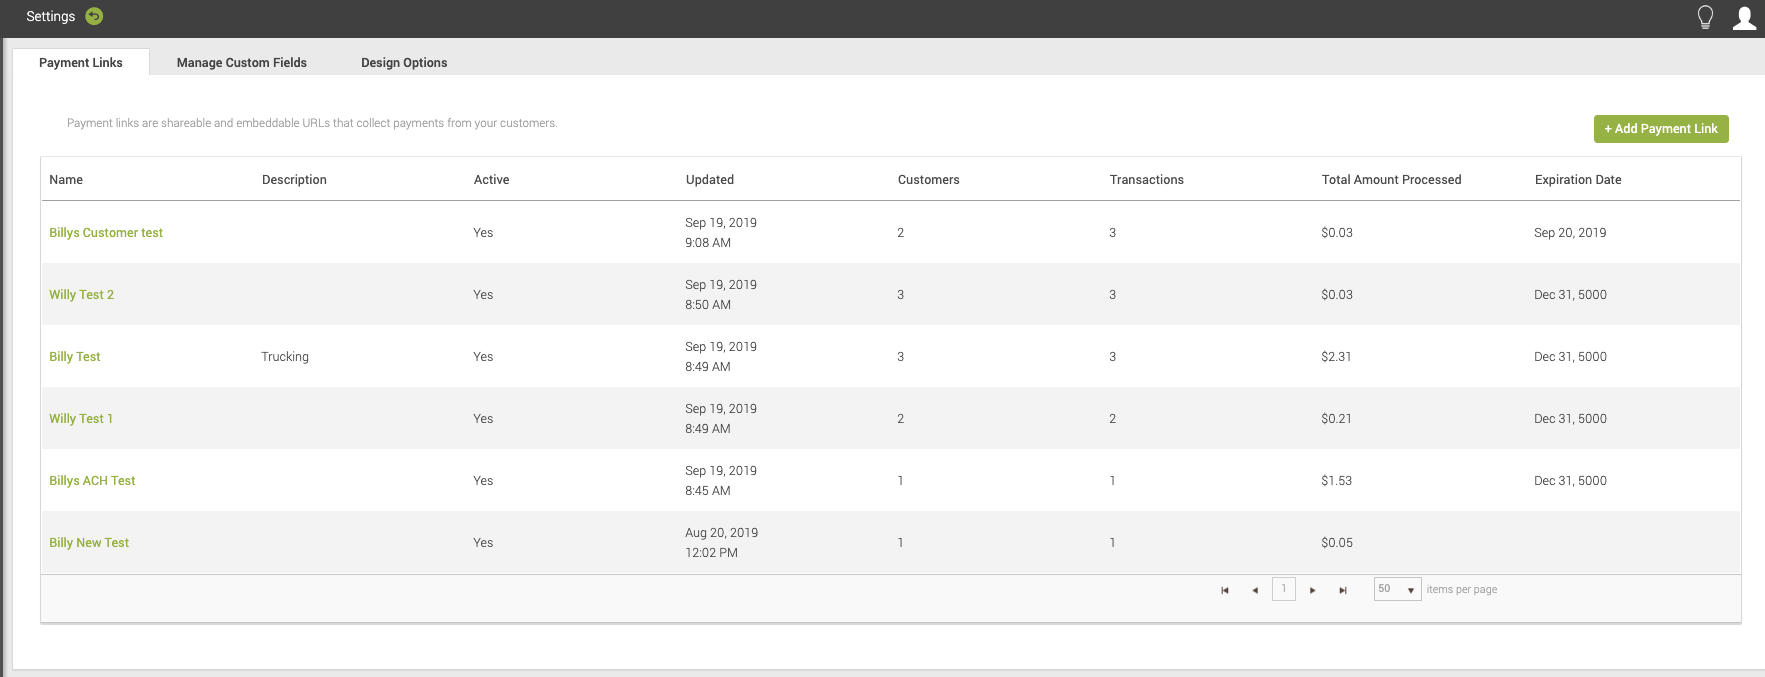
Upon clicking Payment Links in the Settings page, you'll see the three following tabs on top:
MX merchant will show the Payment Links tab by default. Here, you'll find a list of the existing payment links.
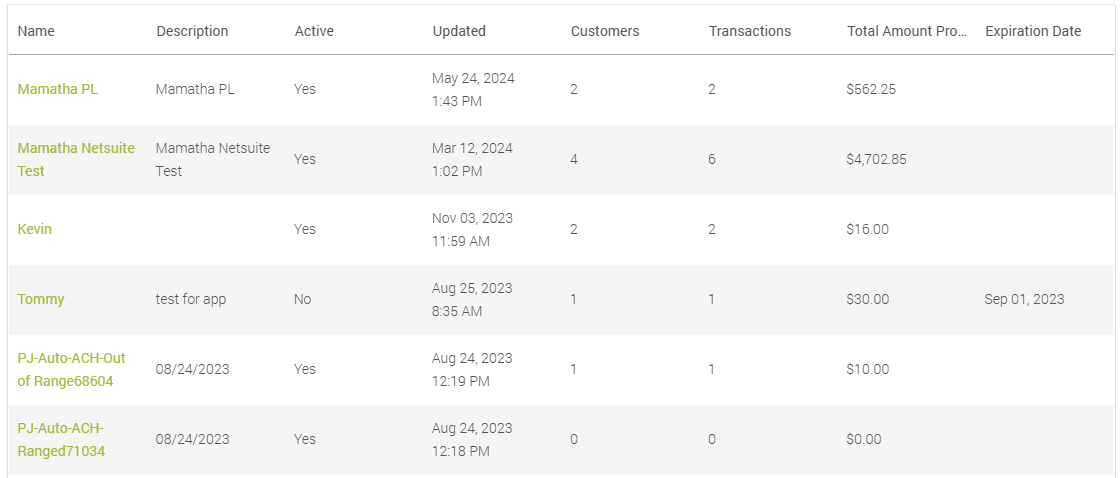
Each link (to the left, in green) is displayed alongside the following information:
- Name - Name you assigned to the payment link when you created it.
- Description - Optional description you added to help identify the purpose of the payment link.
- Active - Indicates whether the payment link is currently enabled and can be used by customers.
- Updated - Date and time when the payment link was last modified.
- Customers - Indicates how many unique customers have used the payment link.
- Transactions - Total number of transactions completed through the payment link.
- Total Amount Processed - Cumulative amount of money collected through the payment link.
- Expiration Date - Date on which the payment link will expire and no longer be available for use.
Create A New Payment Link
To build a new payment link:
- In the Payment Links tab, Click +Add Payment Link. You will then be directed to the General Info tab of your new payment link.
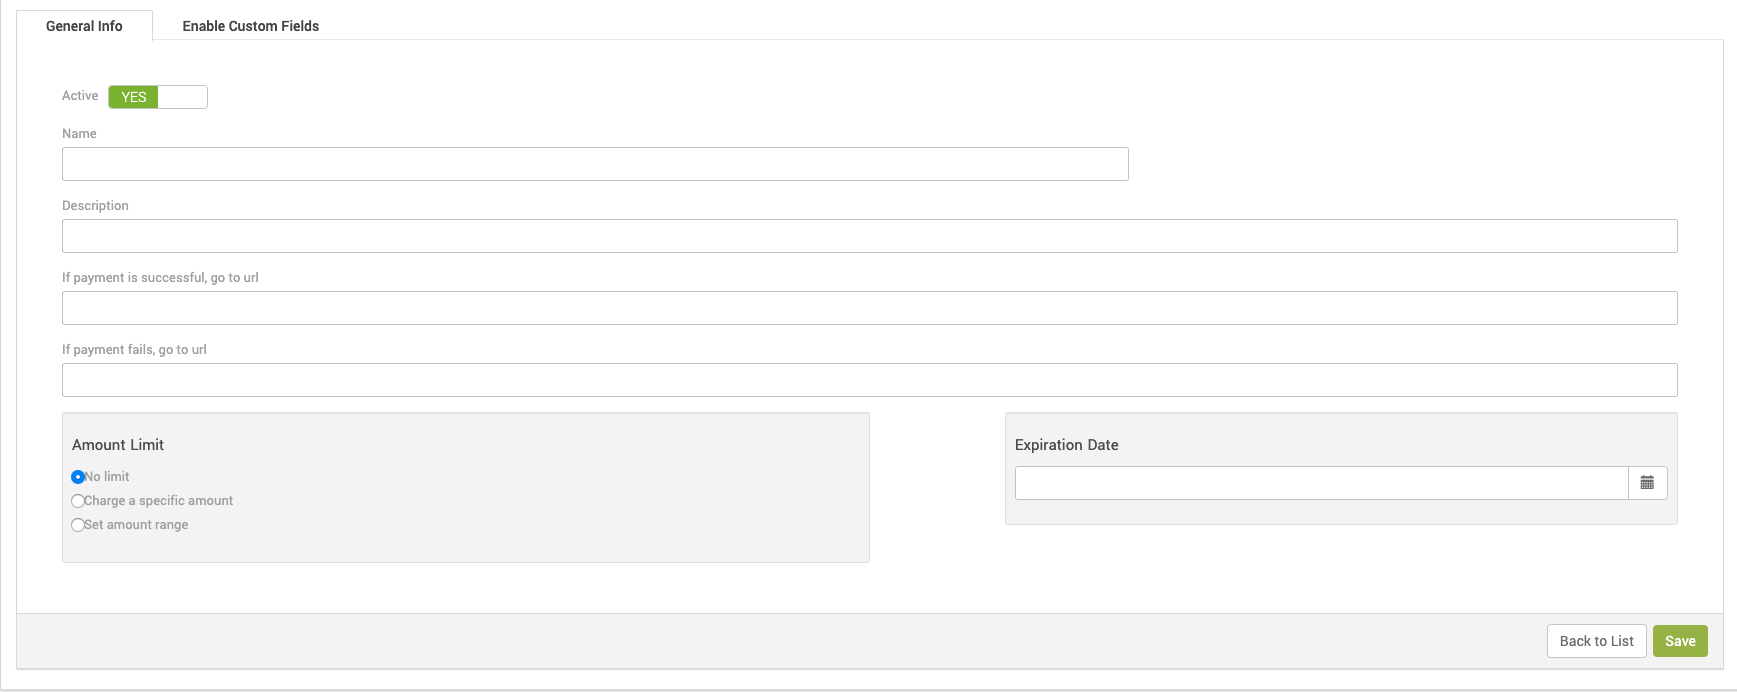
- Fill in the following information:
- Active - Lets you enable or disable the payment link. When the link is active, customers can submit payments; when inactive, no payments will be accepted.
- Name: The unique name you want to assign to the payment link. This helps distinguish it from other links. This field is required.
- Description - Text displayed at the top of the payment link, visible to your customers.
- If payment is successful, go to URL: The page customers are redirected to after a successful payment.
- If payment fails, go to URL - The page customers are redirected to if their payment attempt is unsuccessful.
- Amount Limit - Specify either a fixed amount or an acceptable range. If a customer enters an amount outside this limit, they will be prompted to correct it. The default setting is “No limit”.
- Expiration Date - Date after which the payment link will automatically deactivate and no longer accept payments.
- Prompt for Invoice Number - Allows you to request an invoice number from the customer before completing the payment. This helps you match the payment to the correct invoice.
- Save.
Manage Custom Fields
Creating Custom Fields
You can also add additional custom fields to your payment pages. To do so:
- Click Manage Custom Fields on the Payment Links settings page.

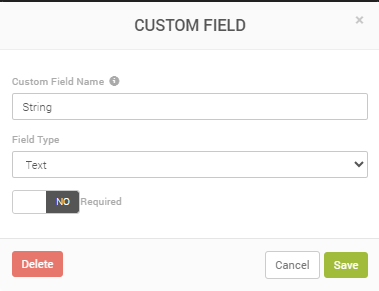
- Click + Add Custom Field. When prompted, fill in the following information:
- Custom Field Name - Unique name you give to the field
- Field Type - Select the type of information the user must enter.
- Text - Enter free text.
- Boolean - Select either Yes or No
- Number - Enter an Integer (example: 4500)
- Decimal - Enter number with decimals (example: 23,45)
- List - Select one option from a list. When creating the field, write in the options separated with a comma (example: Red, Blue, Green, Black). This way, the user will be able to select one of them (example: Green)
- Required - Indicates whether the user must fill in that field.
- Save.
Managing Custom Fields
By clicking on the name of an existing field (written in green in the leftmost column), it will display the information as if you were creating it. You may adjust the field information as needed, and even delete the custom field.
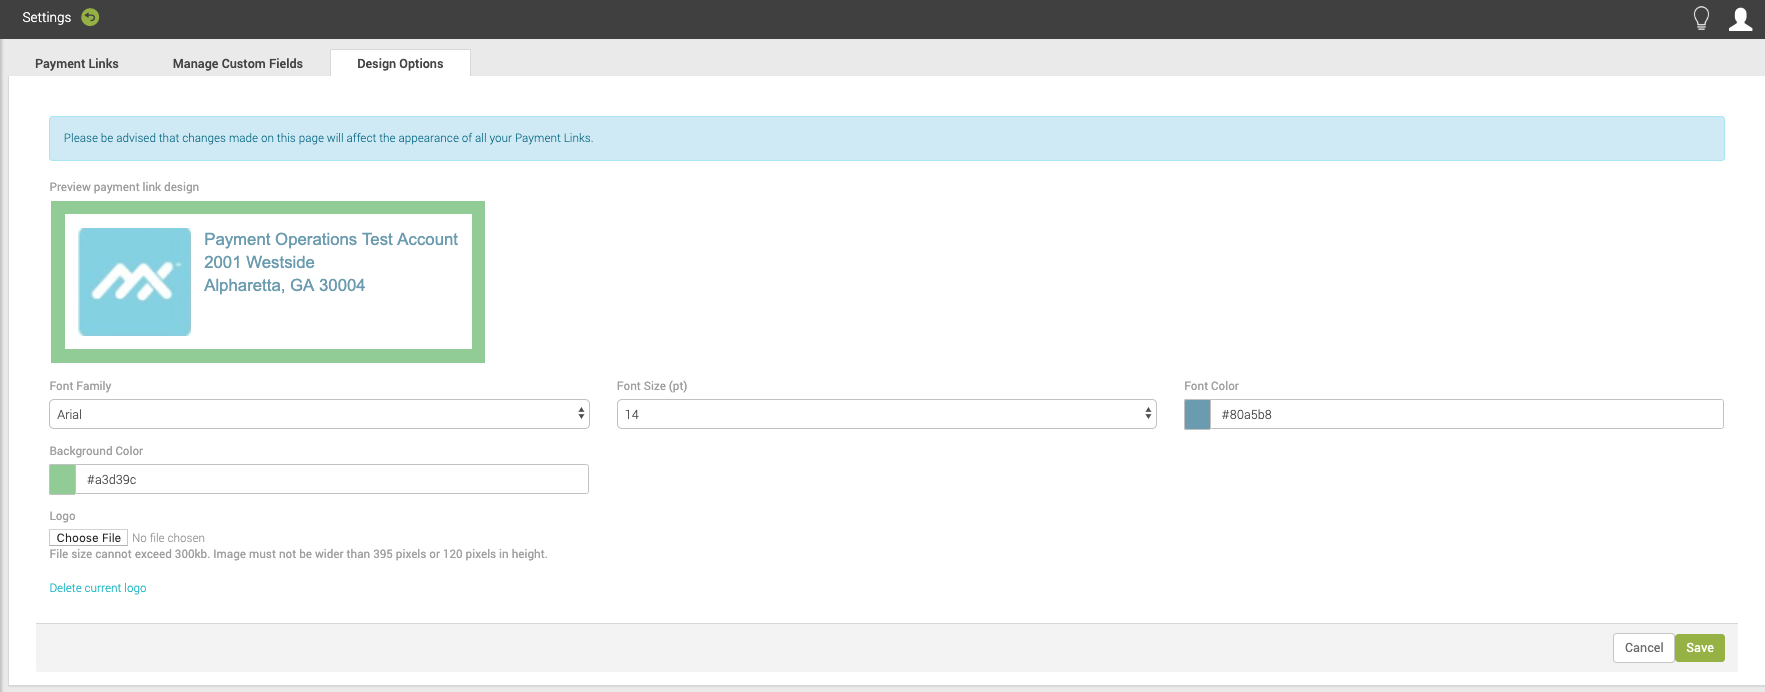
Design Options
MX Merchant offers a number of options to adjust the look of your payment links.
Upon clicking Design Options in the Settings page, you'll see the following options:
- Font Family - Choose your preferred font from a list of 15 available options.
- Font Size (pt) - Choose a size for the text between 8 and 18.
- Font Color - Enter the HEX code for the color for the text.
- Background Color - Enter the HEX code for the color for the background.
- Logo - Choose a suitable image file from your device to be used as a logo.
What the Customer will See
This is an example of how a customer would see your payment link:
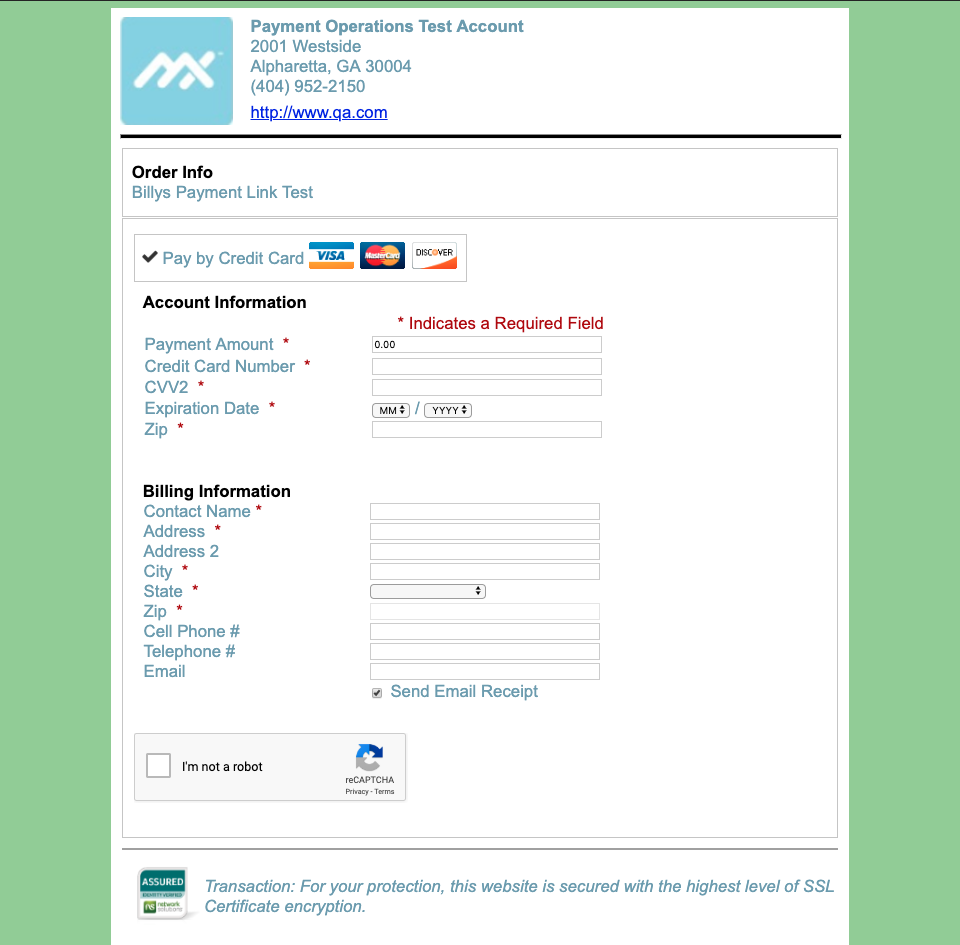
The customer will enter their card information, amount of the transaction, their billing information, confirm they are not a robot, and click Submit.
Your customer will then be redirected to a site If you entered Success and Failure URLs for your link. If not, they will receive a success or decline message at the bottom of the form.
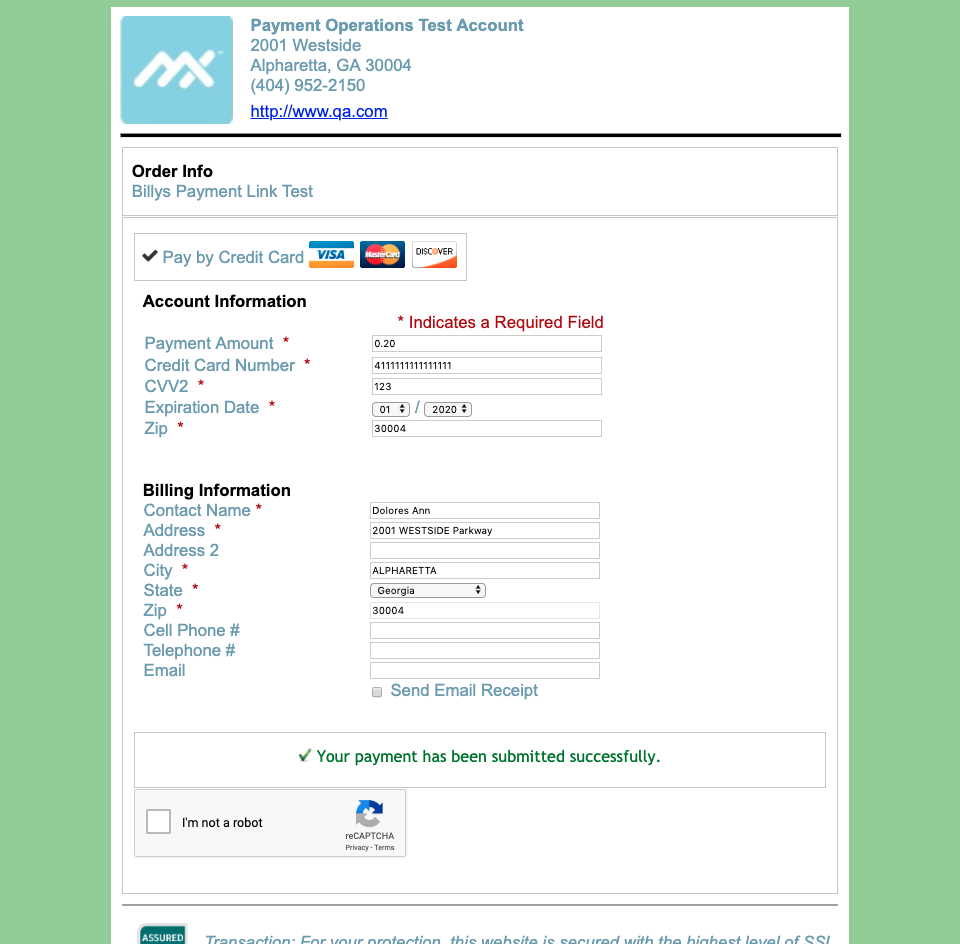
Once a payment is made on this form it will immediately be visible to you within MX Merchant.
Customizing your Link
The following table shows all of the additional fields that can be added by manipulating the URL and/or the HTML so you can capture all the information you need when customers pay through your Payment Link page. This is done by adding a query parameter at the end of the URL and an ampersand between each of the parameters. All of the following parameters are optional.
| Address | Values | Description | URL Addition |
|---|---|---|---|
| Address | A street address | Populates billing first address line | &address= |
| AllowPartial | 1 to allow 0 to not allow | If 1/allowed, the amount is editable | &allowPartial=1 &allowPartial=0 |
| Amt | number | Amount due | &amt= |
| Cell | Phone Number | Populates billing mobile number | &cell= |
| City | City | Populates billing city | &city= |
| ClientData | JSON formatted custom reporting data | ||
| Customer Name | Name | Populates billing contact name | &customerName=firstName%20lastName |
| customerId | MX™ Merchant Customer ID | Creates invoice for existing MX™ Merchant Customer matching the ID | &customerId= |
| Email address | Populates billing email | &email= | |
| hideRequired | 1 to show 0 to hide | Hides the required label only. | &hideRequired=1 &hideRequired=0 |
| Lang | en for English es for Spanish | Default display language | &lang=en &lang=es |
| Memo | Text | Populates Memo Field on MX™ Merchant invoice. If ShowMemo=1, will also display on payment interface | &memo= |
| Phone | Phone number | Populates billing phone number | &phone= |
| PONumber | any alphanumeric | Displays in the Memo/Note field of Payment Modal in MX™ Merchant Dashboard. Not unique, merchant generated | &PONumber= |
| ShowMemo | 1 to show 0 to hide | Displays memo field on payment interface. The customer can edit. The memo also displays MX™ Merchant invoice | &showMemo=1 &showMemo=0 |
| showHeader | 1 to show 0 to hide | Displays Merchant logo, name, and address at the top of the interface | &showHeader=1 &showHeader=0 |
| showOrder | 1 to show 0 to hide | Displays the Order Info/Device name at the top of the interface | showOrder=1 &showOrder=0 |
| State | Two Character Abbreviation | Populates billing state | &state= |
| SystemCustomerId | Non MX™ Merchant Customer Id | ||
| Zip | 5 numbers | Populates billing zip | &zip= |
| ShowPatientName | Patient name | Saves patient name entered in memo field | &showPatientName=1 &showPatientName=0 |
| ShowAccountNumber | Account Number | Saves account number entered in memo field | &showAccountNumber=1 &showA |
Updated 20 days ago