Terminals
Managing Terminals
Manage, add, and edit terminals in MX™ Merchant to control payment devices, configure tipping options, and understand the differences between integrated and semi-integrated terminals.
Overview
This section explains how to manage terminals within MX Merchant, including viewing existing terminals, adding new ones, and modifying their settings. It also outlines the differences between integrated and semi-integrated terminals, as well as the permissions required to perform these actions.
Prerequisites and Limitations
- To adjust terminal settings, the user must have an Admin or Sub-Admin role.
- The process for adding a new terminal, seen below, can only be used for integrated terminals. For adding a semi-integrated terminal, you'll need to get in contact with Priority Commerce by calling (844) 647-3616 or emailing [email protected].
Viewing Current Terminals
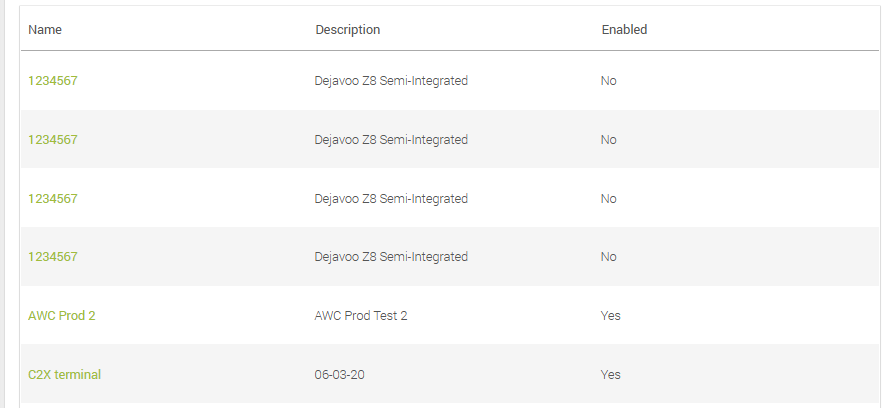
Upon clicking Terminals in Settings, a list of all current terminals is displayed with the following information:
- Name - Name given to the terminal. This name is assigned by the user.
- Description - Brief description of the terminal, added by the user.
- Enabled - Indicates whether the terminal is currently active. Yes shows it to be enabled, while No shows it to be disabled.
Adding New Terminals
- In Terminal, click + Add Terminal on the upper right-hand corner.
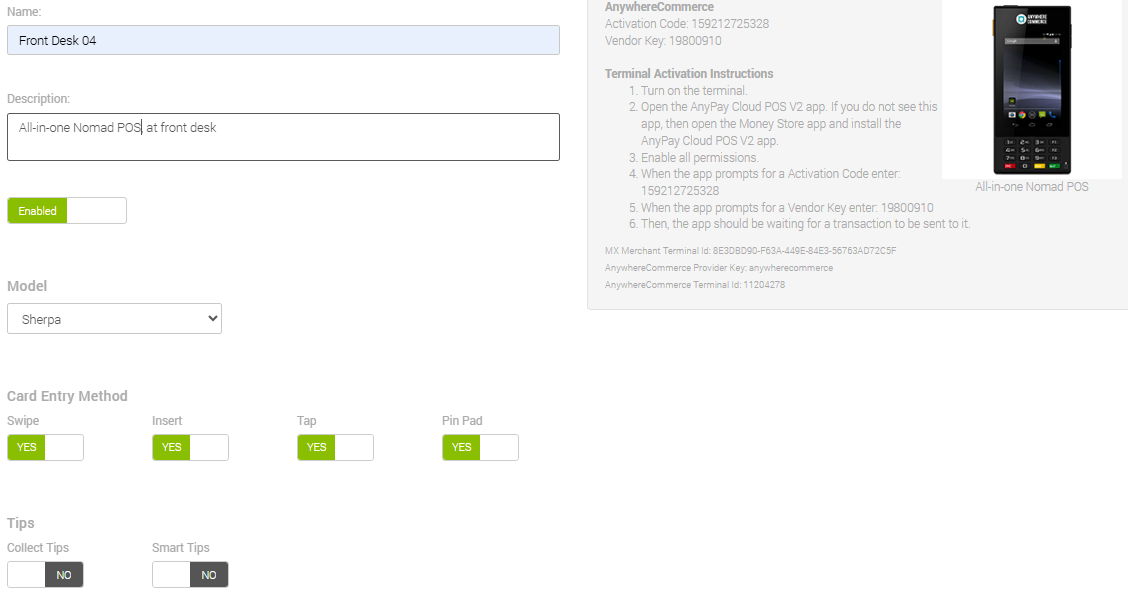
- You'll see the following screen.
- Fill in the following information:
- Name - This name allows you to quickly identify the terminal. It is completely customizable, so you may write, for example, the location (e.g. Front Desk or Table 7), the employee in charge of that terminal (e.g. Nick's Terminal) or a code of your choice (e.g. ABC-1234).
- Description - Small phrase describing the terminal. Generally, you may want to enter the model or a physical description.
- Enabled/Disabled - Indicate whether or not the new terminal will be enabled to take payments. You may always enable or disable a terminal later on.
- Model - Indicate the model of the terminal: Sherpa or Walker 2CX BT.
- Card Entry Method - Specify the options enabled for the new terminal:
- Swipe - Enables acceptance of magnetic stripe cards. The card is read by swiping through the terminal’s magstripe reader.
- Insert - Enables EMV chip card transactions. The card remains inserted in the reader for the duration of the authorization process.
- Tap - Enables contactless (NFC) payments from cards, mobile wallets, or wearables.
- Pin Pad - Allows cardholders to enter their PIN securely on the terminal keypad for debit or chip-and-PIN transactions.
- Tips - Enable or disable the following options
- Collect Tips - Enables the terminal to collect tips directly, thus preventing the need to hand it over directly to workers in cash.
- Smart Tips - Enables the following option for customizing tip collection:
- Set Amounts - You will be able to set up to three different amounts for collecting tips, either as a percentage or as a fixed dollar amount, as in the following example:

In this example, there are two set amounts:
- The one on the left has the number 10 with a percent sign (%) in a green toggle. This indicates that the terminal will take tips equal to 10% of the total amount.
- The one on the right has the number 15 with a dollar sign in a yellow toggle. This indicates that the terminal will take a $15 tip, regardless of the total amount.
- To change whether a number refers to a dollar amount or a percentage, click on the toggle until the desired option is on.
- Save to add the new terminal.
Modifying Existing Terminals
When modifying existing terminals, you'll be presented with a set of options depending on the type of terminal in question:
- For integrated terminals, you'll find this screen, which mostly mimics the options discussed in the Adding New Terminals section. You may edit them accordingly.
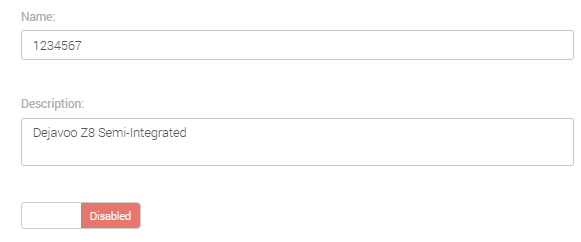
- For semi-integrated terminals, there are far fewer editing options. You may only change their name and description, enable or disable them.
Note:
Only integrated terminals may be deleted on the MX Merchant platform. If you need to delete a semi-integrated terminal, please contact customer support.
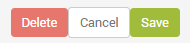
To modify an existing terminal, regardless of type, click on its name, written in green under the Name column. This will display the editing panels shown above.
Updated 20 days ago